It's day 1 of the Rio Sewalong. Today is all about adjusting our pattern pieces, cutting out our fabric, and testing our stitches.
Lengthen / Shorten
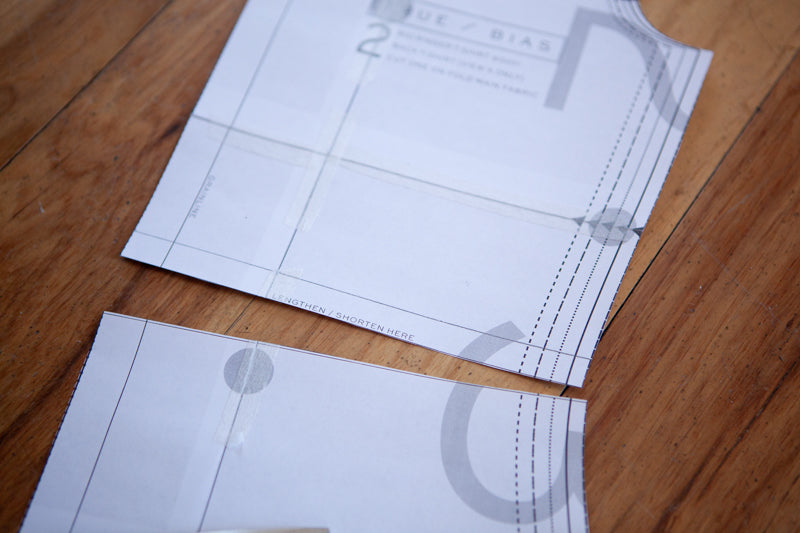
If you are taller or shorter than 5'5" (which is the model we draft for) then you may want to lengthen or shorten your pattern a bit. One common mistake is to add or subtract the difference in height you are from the model in it's entirety. Keep in mind that a t-shirt and even a knee length dress, only cover a portion of your body so you probably only need to add or subtract a portion of the difference. For instance, I am 5'3" which is 2" shorter than the pattern is drafted for. I know that I have a longer torso but shorter legs and that my torso takes up less than half of my height, so I shorten my Rio top by 1/2" at the waistline. Let me show you how I do it.
First I measure up 1/2" from the lengthen / shorten line and draw a line.


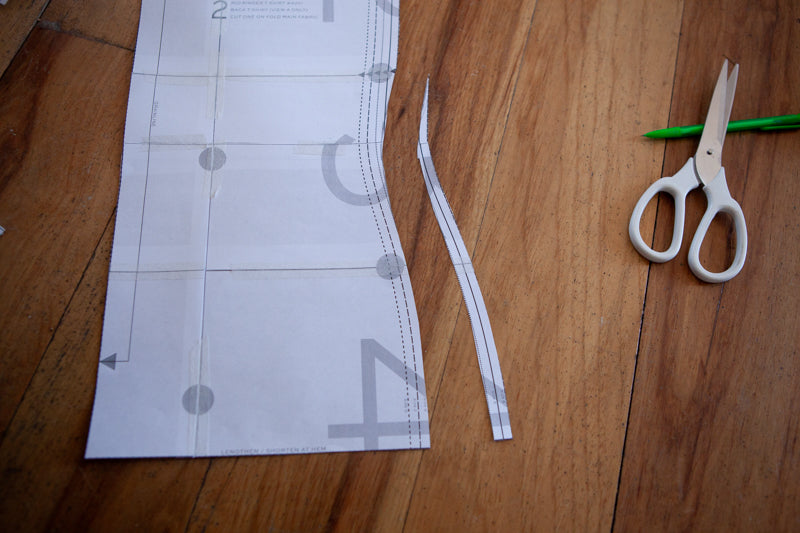
Next, I cut along the lengthen / shorten line and move the bottom portion up to the line I drew. Tape in place.

Next you will need to blend the side seam if necessary. It's that easy. Make sure you do the same for the back piece so that they match up.
To lengthen you will do essentially the opposite. First cut along the lengthen / shorten line.
Get a separate piece of paper and draw two lines that are the distance apart that you want to lengthen by and one that will act as the CF. I am going to do 1/2" for this exercise.

Tape the top and bottom to this sheet of paper on either sides of the lines you drew, making sure that the center front lines up in a straight line.


Blend the side seam.

Trim off any excess paper and do the same adjustments to the back.

GRADING
Another common question I get is grading between sizes. I wouldn't worry too much about grading the waist unless it is more than two sizes difference, since there is ease in the waist to accommodate that. If you are measuring different sizes in the chest and hip I would grade between sizes. It's really just as easy as drawing a soft line between the two sizes.

Make sure you do the same for the front and back pieces so they match up.
Go ahead and cut out your fabric now. Tomorrow we will be sewing so they need to be ready to go.
STITCHES
Before we are done today, I recommend getting scraps of your main and binding fabrics and testing your stitches. I find it easiest to print off the page in the instructions with the recommended stitch lengths and use that as your starting point. Take notes on that piece of paper so you can refer back to it when we are sewing tomorrow. Be sure to put your stretch sewing machine needle in your machine before proceeding.
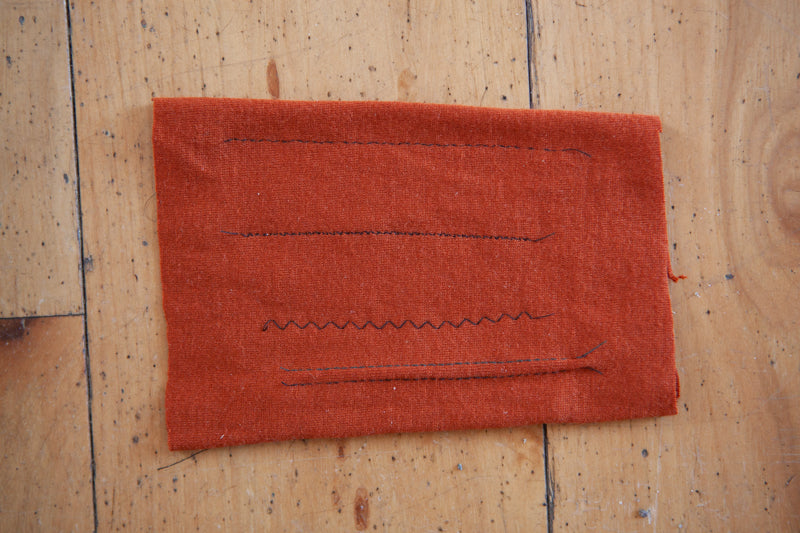
Take your main fabric scrap and fold it so it's doubled up (since when you sew your actual garment it's always at least two layers of fabric).
For the main fabric you need to try a few stitches out. First try the stitch that you would use to construct the garment. If it is a serger test that out. If you do not have a serger you will either use a stretch stitch if your machine has that option or an elongated zigzag stitch if it does not. The elongated zigzag stitch has a recommended 2.5mm length and 0.5mm width. Try it out and see how you like it. Adjust as necessary. Next I recommend trying the zigzag topstitching to see how that works with your fabric when you hem your garment. The recommended setting for this zigzag stitch is 3mm long and 3mm in width. You can also use the elongated zigzag stitch or stretch stitch option for the hem if you prefer. Lastly, if you are going to use a twin needle at all give that a go as you may prefer it for your hem. You may need to play around with tension or stitch lengths to get a result you like. I usually make the length of the stitch 3mm when using a twin needle. Make sure you keep notes so you can replicate it tomorrow.
I also recommend trying out some stitches on your binding fabric. I tried the twin needle, the zigzag topstitching, and the elongated zigzag stitch to see how they reacted to my binding fabric.

Once you have stitches you like, record everything so you are ready to go tomorrow. I will be sewing a couple of samples using the stitches above so you can see how it looks.