Welcome back to day 4 of the Calvin sewalong. Today we will finish up the straps and create all of the things we need for the waist ties to be secure.
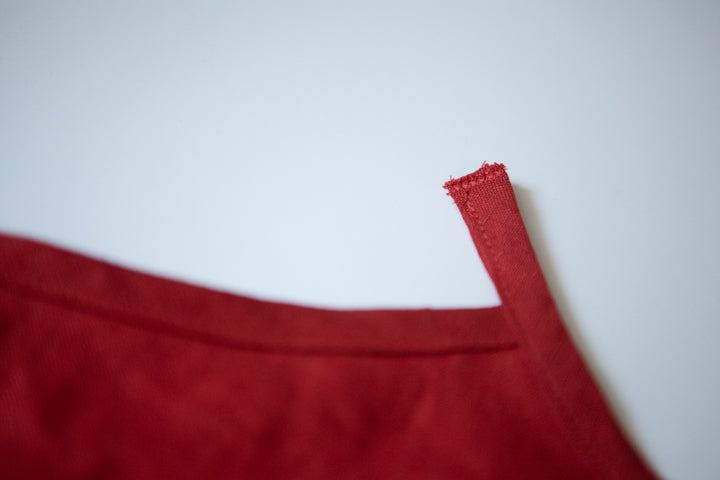
Step 12 - To prevent it from fraying, zigzag stitch the raw end at the back of the armhole. I like to do a small zigzag with a width of 2mm and a length of 1mm.

With right sides facing up, insert the bias binding through the ring.

Fold back the bias binding toward the inside of the garment. I like to cheat the strap inward a bit so that it does not show on the outside of the garment once sewn down.

Stitch securely in line with your topstitching along the back neck binding.

Step 13 - With the right side facing up, slip the slider onto the front strap and move to about halfway down the length of the strap.

Insert the free end of the strap through the ring at the back armhole edge. Make sure that nothing is twisted.
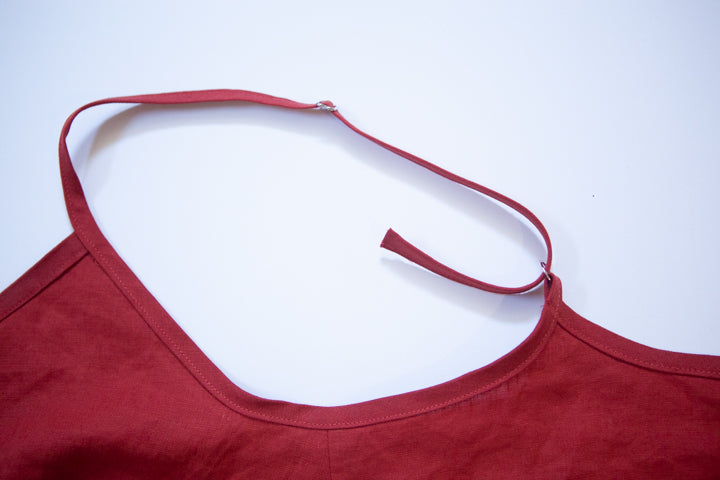
Insert the end of the strap through the inside of the slider, extending the end by 1". The end will be sandwiched inside the loop you created. It helps to loosen the part of your strap that is already threaded through the slider to allow more room to work with.


With wrong sides up, stitch the end of the strap to the inner loop to secure it. You may want to baste this line of stitching first and try it on to check the length of your strap.

Once you have created a straight line of stitching, zigzag stitch over the raw end and through the inner loop to prevent fraying just like you did before.

It should look like this once you are done.

Step 14 - Stitch buttonhole at the right side seam (when worn) according to the marking. I like to add fray check to my buttonhole before I open it. Make sure the seam allowances are pressed toward the back, and that the buttonhole stitching goes through all layers.

Open buttonhole.

Step 15 - Sew a 1" thread chain at the left side seam (when worn) according to marking. Use the following instructions to create your thread chain.
Cut two pieces of thread that are about 25 inches long and pass them through your hand sewing needle. Double them up for four strands of thickness. Tie a large knot in the end.

Anchor the threads by passing through the garment and seam allowances from the wrong side, and out onto the right side of the garment at one of the dots.


Make a small backstitch on the outside of the garment at the same dot marking. Pull thread through, creating a large loop.

Insert your left thumb and pointer finger through the loop, spreading it wide. Hold the thread tail with your right hand.

Pinch the thread tail with your left thumb and pointer finger, continuing to hold the tail taut with your opposing hand.

Pull the pinched thread tail through the loop you created, as pictured. Continue to hold the end of the thread tail with your right hand, allowing enough slack to pull through.

Tighten the loop into a knot at the base of the thread tail, close to the garment. Use your right and left hands to pull up the slack and close the loop.
Once again, insert your left thumb and forefinger through the new loop you just created. Repeat the previous steps until you have created a thread chain that measures 1".

Pass the thread tail with hand sewing needle through the last loop to create a knot.

Pass needle and tail through to the wrong side of the garment and seam allowance at the second dot marking and knot securely on the inside.


It will look like this once you are all done.

And that is it for today. We are so close! Tomorrow we will just finish a few things up and we will be done.