Welcome back for Day 2 of the Calvin wrap top and dress sewalong. I am super excited get started with the actual construction of the top / dress of the Calvin pattern.
Step 4 - Staystitch the neckline and armhole edges on the front bodice and back pieces at 1/4" seam allowance from top to bottom. I know you may be tempted to skip this this step, but it is very important in keeping the pattern pieces from stretching out during handling especially along the front edge.


Step 5 - To sew the dart on the front bodice, fold the dart markings with right sides together, aligning the dart legs you have marked and ensuring the dart point (apex) is on the fold. Pin to secure. Stitch along dart leg to point, reducing stitch length to 1mm within 1/2" of the point.


Do not backstitch, but leave long thread tails.

Tie thread tails in a secure knot. Trim threads.

Press dart down towards lower edge. I like to press the darts on a tailors ham or rolled up towel so you get a nice curve.


Step 6 - To finish the front opening edge of the front, fold and press the raw edge to the inside by 1/4"

and then another 3/8".
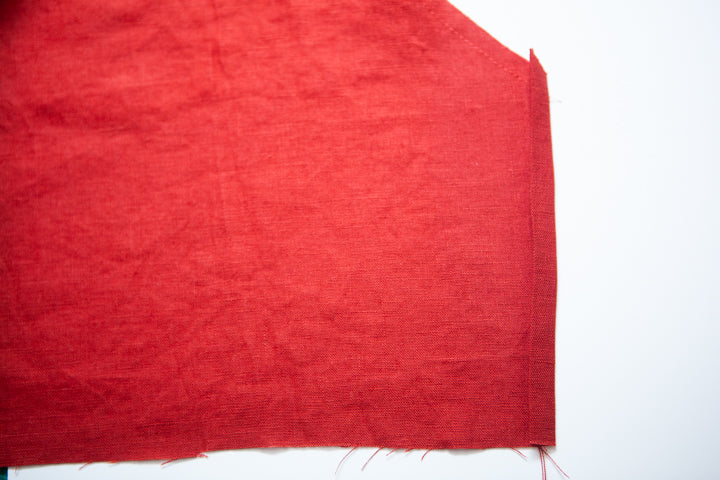
Stitch along fold from top to bottom to secure.

Here is the right side.

Repeat steps 5 and 6 for other front. You are finished with the front pieces for today so you can set these aside for now.


Step 7 - With right sides touching, pin the two back pieces together along the center back. (Pay extra attention to the notches to make sure you are matching up the center back and not the side seams as they look very similar.) Stitch the center back seam.

Trim seam allowances to 3/8" and finish in your desired manner. I am serging them to keep it simple but you can also zigzag stitch the edges together, use pinking shears, or even sew a french seam.

Press seam allowances open or to one side.

Step 8 - Flip over the back piece so that the wrong side is facing up. To apply the bias binding to the curved back neck edge, first open up one side of the pre-pressed back neck binding (pattern piece 3). Working with the wrong side (inside) of the back facing up, align the raw edge of the bias binding with the raw edge of the back neck edge. Do not stretch the garment, but slightly pull on the bias binding so that it lays nicely along the curved edge. Pin. Note that the binding will be slightly longer than the center back edge.

Stitch using the fold as a guide.

If your fabric / binding is thick, you may want to grade the seam allowance before proceeding to reduce bulk. I decided to do this since my linen is a bit thick. This probably isn't necessary if you are using something thinner like a crepe. To grade I trimmed one seam allowance to 1/4" and the other to 1/8". Remember that the seam allowance that is pressed towards the outside of your garment should be the longer one.
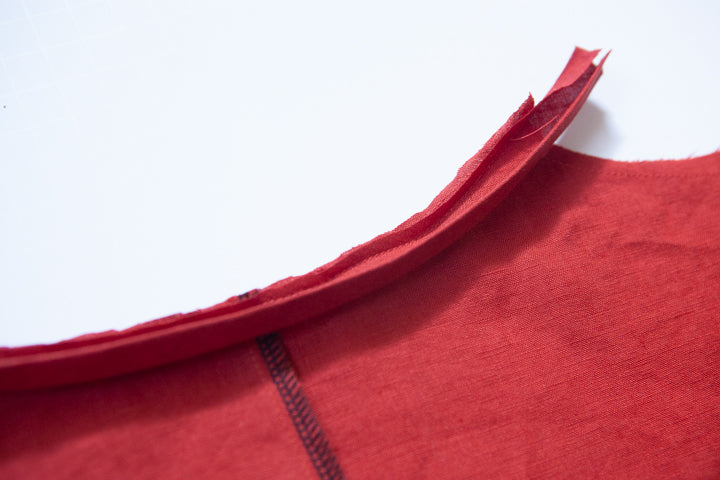
Flip over the back so that the right side is now facing up. Fold the bias binding toward the outside of the back so that it is sandwiching the raw edges. Adjust the bias binding so that it is just covering the line of stitching you just made. Press and pin the bias binding in place.

To secure the bias binding, edgestitch close to the fold with the right side of the garment facing up.

Trim off excess bias tape at ends, as needed. Press.

That is it for today. I hope you liked applying the bias binding because we have quite a bit more of that coming up and we will be applying it in the same manner.