After putting together some summer sewing plans, I decided that I really wanted to play around with bleaching and distressing denim in order to achieve the perfect worn in look for a pair of 70s inspired Landers and a Closet Case Patterns Fiona Dress. I wasn't really sure where to start, but after digging deep into pinterest I finally found two great blog posts that I relied heavily on (Megan Nielsen and Alina Design Co.). I ended up combining them along with some trial and error for my own method, but I do recommend checking them both out if you want to give this a try for yourself.
I started with three different types of Denim from my stash. Because they were from my stash I am not certain on the weights, colors, brands etc... of the denims, but they are all stretch denims and two were cone mills. I was interested to see how the spandex would be affected by the bleach but also knew that I wanted the clothing made from these to have some stretch recovery so I stuck with them. Before I go any deeper I should say that every denim reacted differently and so I do not recommend you going forward with bleaching an item without first doing a test like this one. It's simple and worth the experiment.
MARK YOUR DENIM
The first thing you need to do is mark each of your swatches. You will be surprised how hard it is to differentiate between the denims once they are in the bleach bath so it is very important that you mark them all with a permanent marker on the back. Be sure to have one swatch for each denim type that is the original, meaning that it will not go in the bath at all, so you have something to compare it to.
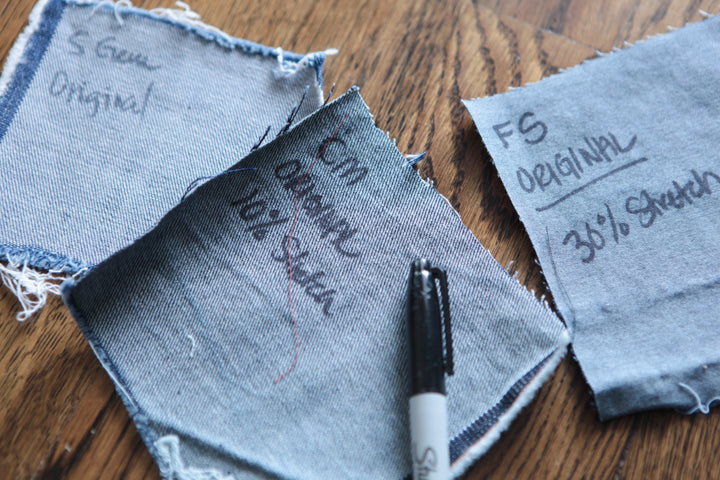
I wrote some initials to give me an idea of which denim it was, along with how long that swatch would be in the bath. So, each denim had an original swatch and one for 15 min, 30 min, 45 min, 1 hr, and 2 hrs.

I also decided to sew a few seams in some. If I were being more thorough I would have sewn seams in all of them, but I was being a bit lazy so I just did it on the 15 min and 1 hr swatches for each type of denim. I wanted to see how the bleach took to the seam edge and also wanted to play around with the seam later during distressing.
BLEACH BATH
Unfortunately I forgot to take pictures of this part, but it's easy enough to explain. I used a 4:1 ratio of water to bleach so that I could replicate it easily on a larger scale once I do my bigger ones down the road. So for me this meant 16 cups of water and 4 cups of bleach stirred up into a large plastic bin. I grabbed a spoon that I could ruin and kept a timer close and went to work.
I dropped them all in at the same time and tried to stir them all for the first 15 minutes. I wasn't as vigilant after that. The first thing that I noticed right away is that some of the swatches wanted to roll up. I think next time I would wet them all first which I am hoping would help with that. I ended up getting a few uneven spots as a result of the rolling. If I had gloves on I probably could have done a better job of getting them flat though.
One thing to note is that the water began to get pretty yellow pretty fast. I have been told that it has something to do with the spandex in the fabric so consider yourself warned.
Once the first 15 min. time went off I pulled out the three 15 min swatches and plunged them into a big bucket of water. Then I just continued the timer until all were done.
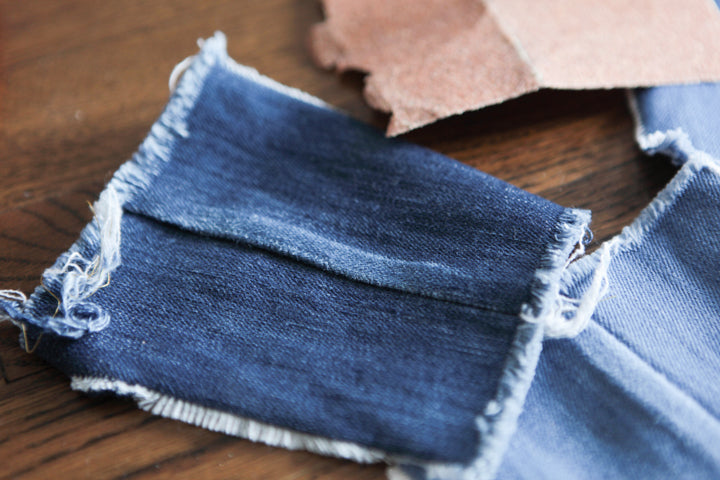
As soon as they were all out of the bath I put them into a washer with detergent and ran a cycle. Then I dried them all on high. Here is what I ended up with (The top one is the original and then its 15 min, 30 min, 45 min, 1 hr, and 2 hrs) :

I find it interesting that almost all of the change happened within the first 30 min. If I were to do it again I would probably do 5 or 10 min increments instead of 15 for the first 45 minutes \. Another thing of note is the color undertones you get with the different denims. The true blue denims stayed within the cool hues even in the most bleached swatches, while the blue/black denim in the middle starts to take on a yellow tint as it gets lighter. I don't necessarily prefer one to the other, but it is something to think about.
DISTRESSING YOUR DENIM

Now that the swatches are all bleached it's time to play with distressing the denims. I grabbed three different weights of sandpaper from my garage - 60, 120 and 300 grit. The 60 is the more coarse sandpaper while the 300 is more fine. I thought I would prefer the 300 but was surprised that I actually liked the 60 the best. I just found that the sandpaper really began to pill the fabric so the fewer swipes the better. The 60 grit did the job right away.

I havn't tried the distressing with topstitching yet but I was told that you shouldn't let the sandpaper touch the topstitching at all. This makes sense of course because it will destroy the thread. This may be a little tricky since I plan to bleach and distress once my garments are all sewn up, but I am guessing I will just have to be super careful.
I did find out right away that the softer denim with the most amount of spandex could not handle the distressing. It just ate the fabric. But both of the cone mill denims with minimal spandex worked great. I am assuming an all cotton, no stretch denim would work even better.
I absolutely love the way both the bleaching and distressing turned out. I realize it weakens the fabric so I need to be careful, but it gives such a beautiful, lived in look that I can't wait to try it on actual clothing. My plan for now is to go with a bleach time in the 30 - 45 min range, knowing that the fabric will naturally get lighter and more distressed over time with wear. I am hoping to get to sewing up the clothing some time in May or June and will post more about it then.