
I am so excited about all of the
Ogden hacks that I have seen popping up over the past few weeks. I guess that is the beauty of a simple pattern isn't it? So many possibilites. Here are a few of my fav hacks that I have seen so far -
here,
here and
here.
I put together a very simple Ogden hack for today where essentially you add a large gathered rectangle to a baby doll type silhouette. It's very easy and it completely transforms the pattern.
The first thing we are going to do is shorten the cami front and back. I am assuming that if you are making this hack then you already have made this original pattern. If so, try it on and decide where you want the end of the bodice to be and the skirt portion to begin. When I tried mine on, I decided on about 10 inches down from the center V. Then I added 1/2" to both the neckline and bottom for seam allowance so the total drop at center front was 11 inches. Now mimic the basic shape of the original hem for this new hem at the shortened length.
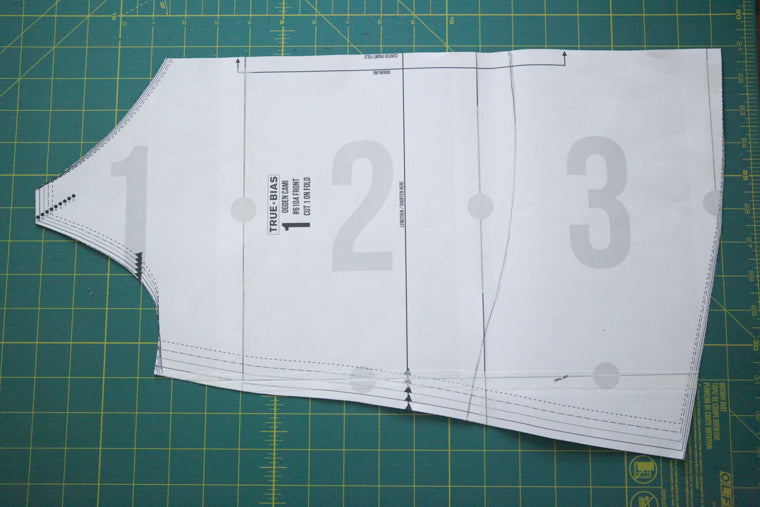
Line the side seams up of the front and back cami to make sure that they are the same length and make a new cutting line for the back cami just like you did for the front. Note that the back is going to be straighter than the front. The front needs the more curved hemline to accomodate the fullness of your chest.
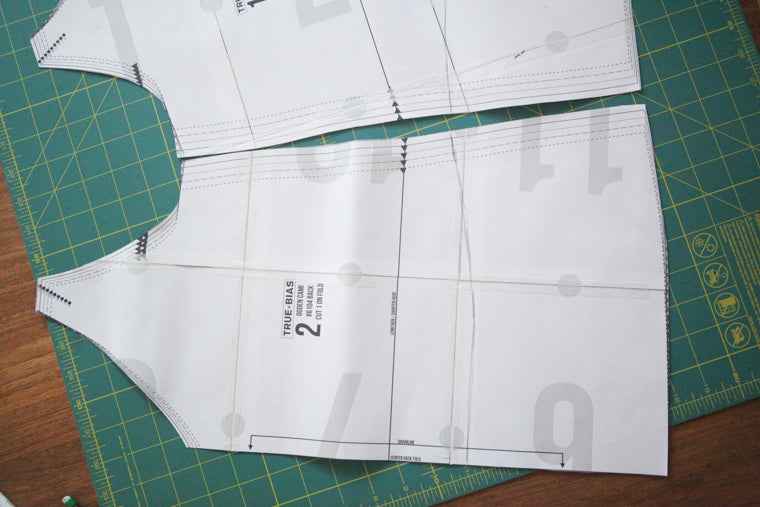
Now cut along the lines you made.
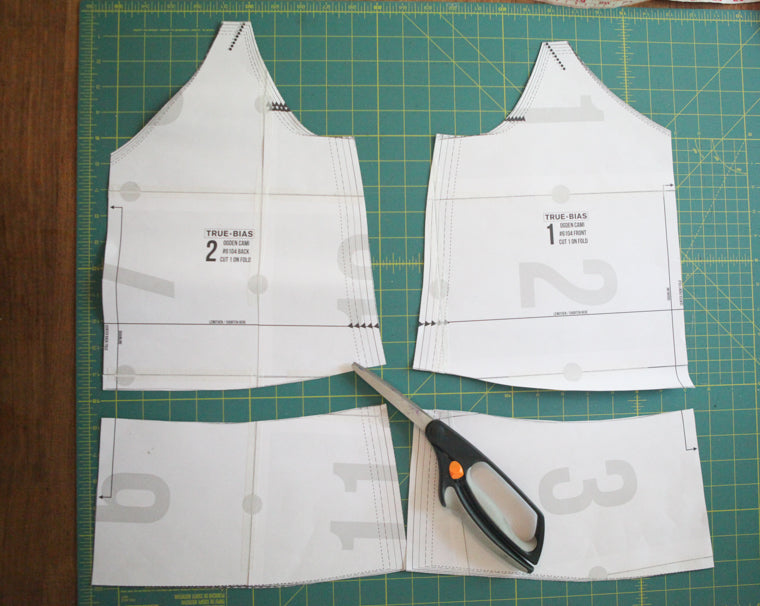
Cut out
two front camis and
two back camis on the fold, and your straps. You will not be using the lining pattern pieces from the original cami pattern. This dress will have a fully lined bodice so one of the fronts and one backs will be your lining.
You also need to cut out your skirt pieces. You are going to cut out two identical rectangles. Decide how long you want the skirt and add 1/2" for the top seam allowance and 1" for the hem. Cut it according to your preference. I wanted a 26" skirt so with the seam allowance and hem mine was 27 1/2" long.
For the width it also depends on how full you want yours (and how wide your fabric is). For reference mine is 43" wide so I cut it at 44" wide because of the 1/2" seam allowance on both sides. So in the end, I cut two rectangles that were 27 1/2" tall and 44" wide.
Once everything is cut out you can start sewing. You are going to sew the top portion of the cami up exactly like the instructions except
do not hem the outer cami or the lining. It should look like this.
Next, sew the two rectangles together (right sides together) along the side seams at 1/2" seam allowance and finish in your desired manner. I serged it to keep it simple, but french seams would be a great choice if you want the whole inside of the dress to be perfectly finished.

Now you are going to run two parallel gathering stitches along the top of the skirt. It's easiest to do two on the front and two on the back, stopping and starting right before and after the side seams.

Gather up the stitches so that the gathering is evenly distributed and the top of the skirt is the same width as the bottom of the cami. With right sides touching, pin the skirt to the main cami (keep the lining up and out of the way). Stitch at 1/2" seam allowance and press all seam allowances up towards the cami.


Separate your lining and press the bottom up (wrong sides touching) by 3/8".

Bring the lining down towards the skirt and pin the folded edge over the seam where the skirt and main cami meet. You will be completely covering the seam allowance. Pin generously.

On the right side of the dress, stitch in the ditch at the seam where the cami and skirt meet, catching the lining underneath.

Try the dress on the make sure that you like the length and adjust as necessary. Fold the bottom up by 1/4" and again at 3/4". Press and Pin and stitch the hem in place. That's it.

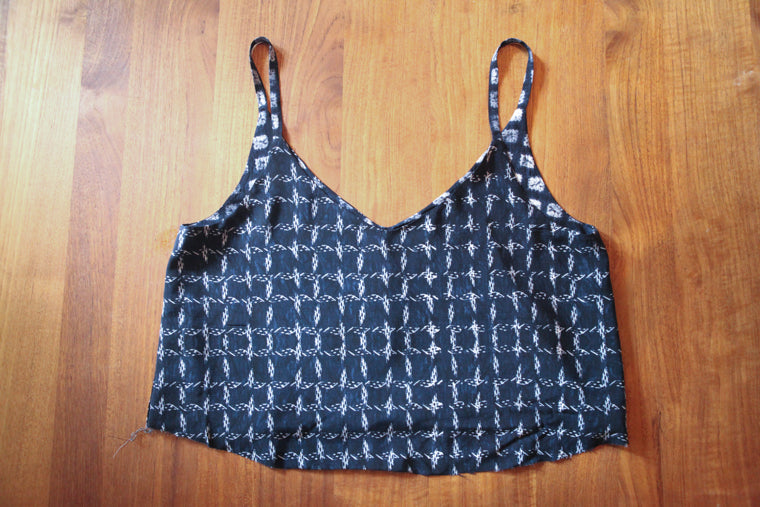
Here is my version. I decided to make this one middie length although I really want to make another one that is above the knee. I wore this dress this weekend to the farmers market with flats and a jean jacket and it was perfect. I love everything about it.
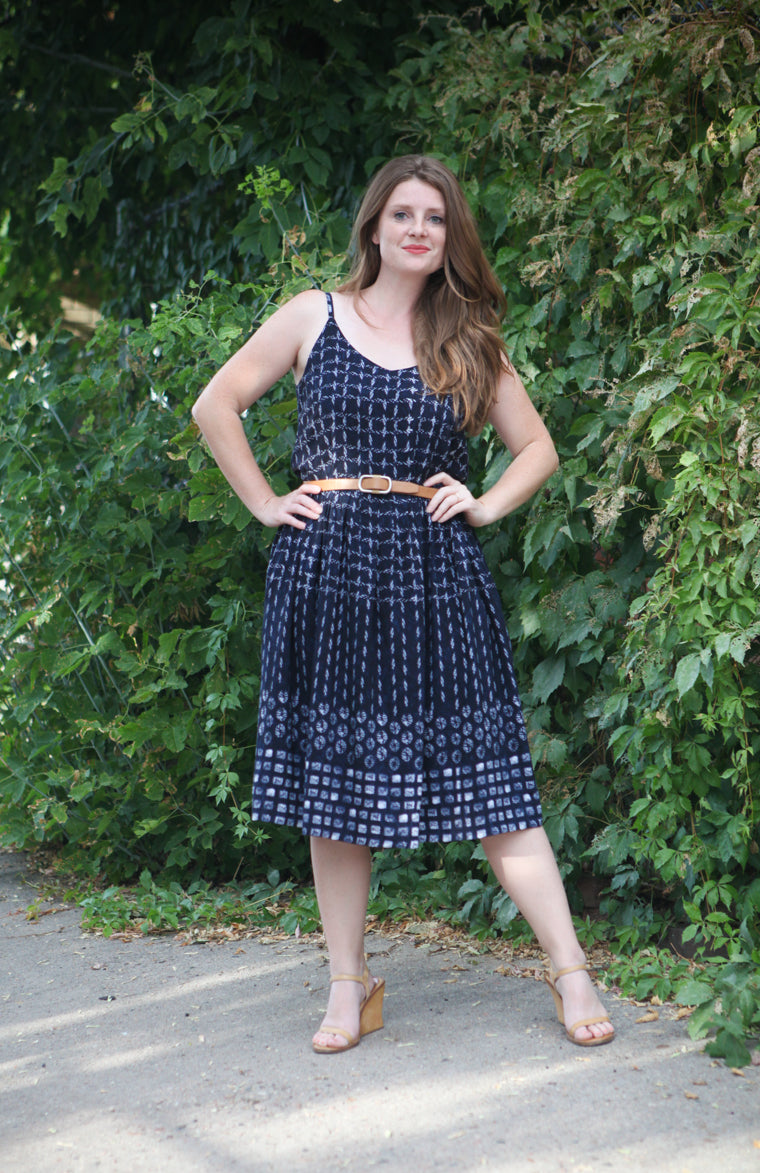


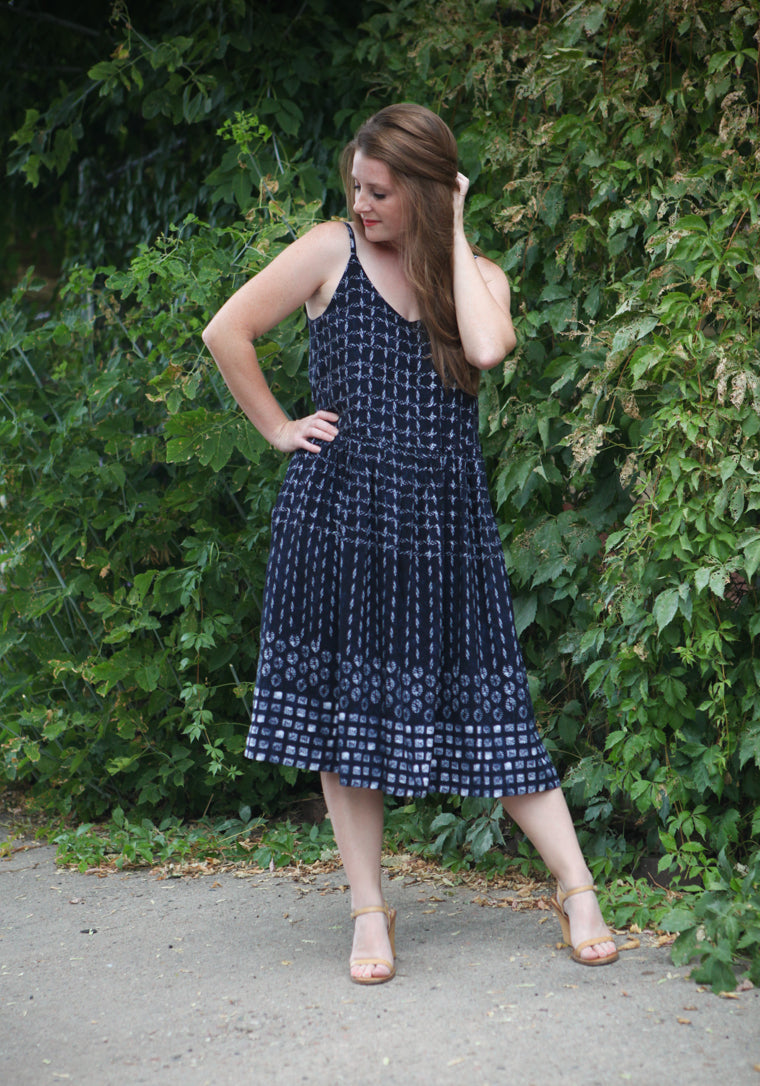
Here it is without a belt. As you can see it is kinda a baby doll shape. I love it this way as well, and I think when I make a shorter one I will wear it without the belt more often.

That's it. If you still need the Ogden cami pattern you can purchase it
here. Let me know if you have any questions.