
We are back with the fourth and final Ogden hack as part of this year's Ogden Month. I am obsessed with how simple and elegant this hack turned out. It also ended up being the easiest hack of all four. If you have sewn up the Ogden cami pattern before, this will be a very easy hack for you to pull off.
You will need all of your Ogden pattern pieces for this hack, but we will be altering the front and back pieces. Let's start with the front.
Get a large piece of paper and draw long line down it to be the new CF line. Tape your front pattern piece up against the new CF line. Add 1/2" to the CF line as the seam allowance since there will now be a seam down center front. You will need to make your best guess for how long you want your Ogden to be. I ended up making mine about 45" in total length from the CF V to the hem. I am 5'3" and this worked will for me. I suggest holding up a measuring tape and giving it your best guess. It's always better to go longer than shorter. Make a dot where you think you want the top of your slit to end (go shorter on this knowing you can always sew down longer after trying it on.).

Draw a line straight out to the left at 90 degrees from CF to be your new hem line.

Now you need to draw the new side seam. I like to start at the chest and shave off some of the side seam around the hip. For me about 1.5" is right but I recommend being conservative knowing you can always take in more later is you want. You want at least 4 inches of ease around your hips in the end. Once you hit the hips, draw straight down to connect to the hem.

For the back, do the same thing for the CB and hem except the back is on the fold (no need to add the 1/2" seam allowance to CB). Use the front pattern side seam by flipping it over and copying it to your back pattern piece so that they match. Add notches to make it easier to sew up.

Cut out all of your pattern pieces as follows:
- Front - cut 2 (1 pair)
- Back - cut 1 on fold
- Front Lining - cut 1 on fold
- Back Lining - cut 1 on fold
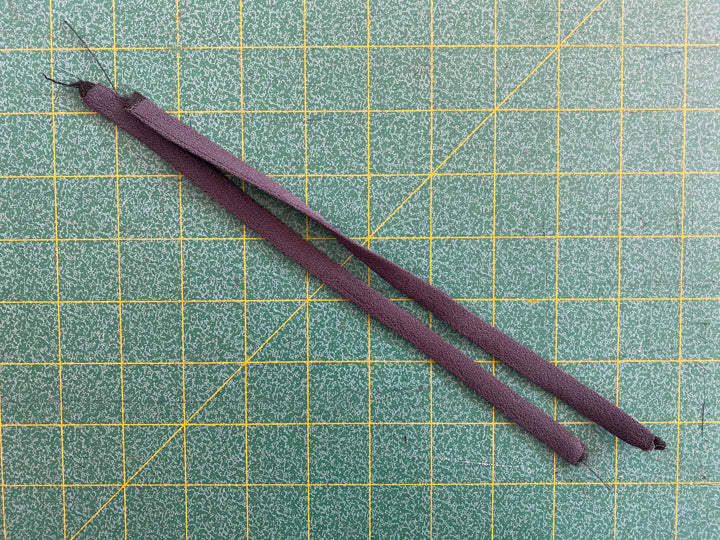
- Straps - cut 2 fabric and 2 interfacing
You may notice that I suggest interfacing your straps. Because of the extra weight caused by the dress length, as opposed to the cami length, I have found that interfacing your straps prevents them from stretching out with wear.
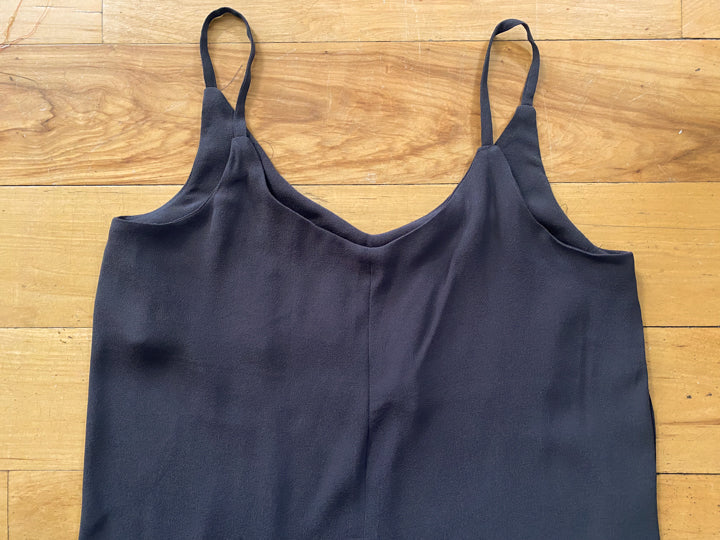
Finish the seam allowances of Center Front of each of your Front pieces. Sew them together at 1/2" seam allowance from the top down to the slit marking and backstitch. Press seam allowances open above slit marking.


Now that the Front is sewn up it will act as one piece and you can sew up the top of your Ogden just like the instructions indicate.
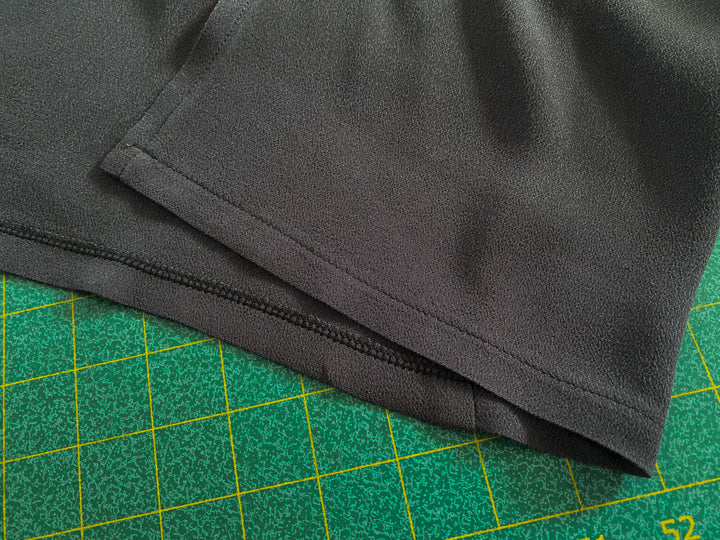
Now for the slit. This is a good time to try on your Ogden and make sure you don't want to adjust the sideseams or the slit length. Make those changes now if necessary.
Press your slit seam allowances back by 1/2" on both sides below the slit marking.

Starsting at the bottom, stitch up one side at 3/8". Stitch across just above the slit marking, and then sew back down the other side at 3/8".

Finish the seam allowance of the bottom of your dress - I serged mine. You can also fold the raw edge in by 1/4" if you want. Fold up by 1/2" and press and pin. Stitch close too the edge to complete your hem.
And that is it! I just love the way that it turned out. Such an easy and simple Ogden hack. I hope you enjoyed it.